An HTML form element is utilized to gather user input, which is typically sent to a server for processing.
The <form> Element
The HTML <form> element is employed to generate an HTML form for user input.
<form>
<!--form elements go here -->
</form>
The <form> element serves as a container for various types of input elements, including text fields, checkboxes, radio buttons, submit buttons, and more.
The <input> Element
The HTML <input> element is one of the most commonly used form elements.
An <input> element can be displayed in various ways, depending on the type attribute.
Here are some examples:
Text Fields
The <input type="text"> defines a single-line input field for text input.
<form>
  <label for="fname">First name:</label><br>
  <input type="text" id="fname" name="fname"><br>
  <label for="lname">Last name:</label><br>
  <input type="text" id="lname" name="lname">
</form>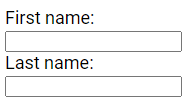
It's important to note that the default width of an input field is 20 characters.
The <label> Element
The <label> tag is used to label many form elements.
For screen-reader users, the <label> element is beneficial because the screen-reader will read the label aloud when the user focuses on the input element.
To link the <label> and <input> elements, the for attribute of the <label> tag should match the id attribute of the <input> element.
Radio Buttons
The <input type="radio"> defines a radio button.
Radio buttons let a user select ONE of a limited number of choices.
<form>
  <input type="radio" id="html" name="language" value="HTML">
  <label for="html">HTML</label><br>
  <input type="radio" id="css" name="language" value="CSS">
  <label for="css">CSS</label><br>
  <input type="radio" id="javascript" name="language" value="JavaScript">
  <label for="javascript">JavaScript</label>
 </form>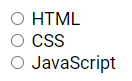
Checkboxes
The <input type="checkbox"> defines a checkbox.
Checkboxes allow a user to select zero or more options from a limited number of choices.
<form>
  <input type="checkbox" id="fruit1" name="fruit1" value="Apple">
  <label for="fruit1">Apple </label><br>
  <input type="checkbox" id="fruit2" name="fruit2" value="Mango">
  <label for="fruit2">Mango</label><br>
  <input type="checkbox" id="fruit3" name="fruit3" value="Orange">
  <label for="fruit3">Orange</label>
 </form>
The Submit Button
The <input type="submit"> defines a button for submitting the form data to a form handler.
The form handler is usually a file on the server containing a script for processing input data.
The form handler is specified in the form's action attribute.
<form action="/submission_page.php">
  <label for="fname">First name:</label><br>
  <input type="text" id="fname" name="fname" value="John"><br>
  <label for="lname">Last name:</label><br>
  <input type="text" id="lname" name="lname" value="Doe"><br><br>
  <input type="submit" value="Submit">
</form>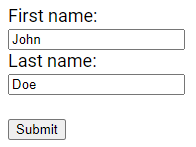
The Name Attribute for <input>
It's important to note that every input field must have a name attribute to be submitted.
If the name attribute is omitted, the value of the input field will not be sent.
For example, the value of first name input field will not be sent in case of the below code, because it does not contain the name attribute.
<form action="/submission_page.php">
  <label for="fname">First name:</label><br>
  <input type="text" id="fname" value="John"><br><br>
  <input type="submit" value="Submit">
</form>
Please check the next tutorials in this guide to learn more about HTML forms. Please check below options for the links to our previous or next tutorial.