In this tutorial, you'll learn about the CSS margin and padding properties.
CSS Margin Property
The CSS margin properties create space around elements, outside of any defined borders.
With CSS, you have full control over margins. You can set the margin for each side of an element individually (top, right, bottom, and left).
.box {
  margin: 20px;
}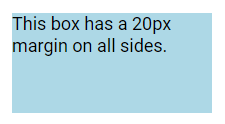
In this example the .box class adds a 20px margin on all sides.
Margin - Individual Sides
CSS provides properties to specify the margin for each side of an element:
margin-topmargin-rightmargin-bottommargin-left
Each of these margin properties can accept the following values:
auto:The browser calculates the margin.length:Specifies a margin in units like px, pt, cm, etc.%:Specifies a margin as a percentage of the width of the containing element.inherit:The margin is inherited from the parent element.
Note: Negative values are allowed for margin.
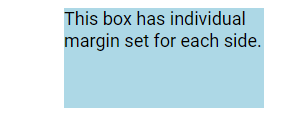
.box {
  margin-top: 15px;
  margin-right: 50px;
  margin-bottom: 30px;
  margin-left: 80px;
}
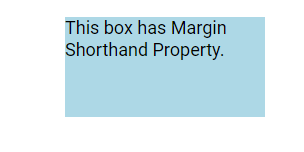
Margin - Shorthand Property
To simplify the code, you can use the shorthand margin property to specify all the margin properties in one declaration.
The margin property is a shorthand for the following individual margin properties:
margin-topmargin-rightmargin-bottommargin-left
Here's how it works:
If the margin property has four values:
.box {
  margin: 20px 40px 60px 80px;
}- The top margin is 20px.
- The right margin is 40px.
- The bottom margin is 60px.
- The left margin is 80px.
If the margin property has three values:
.box {
  margin: 20px 40px 60px;
}- The top margin is 20px.
- The right and left margins are 40px.
- The bottom margin is 60px.
If the margin property has two values:
.box {
  margin: 20px 40px;
}- The top and bottom margins are 20px.
- The right and left margins are 40px.
If the margin property has one value:
.box {
  margin: 20px;
}- All four margins (top, right, bottom, left) are set to 20px.
Margin Auto Property
The margin auto is a shorthand property that sets the margin of an element automatically. It instructs the browser to evenly distribute any available space around the element, typically used for centering an element horizontally within its container.
.box {
  width: 400px;
  margin: auto;
  border: 1px solid orange;
}
The inherit Value
The inherit value in CSS is used to explicitly set a property to inherit its value from its parent element. When applied to a property, such as margins (margin: inherit;), it means that the element will inherit the computed value of the specified property from its parent element.
div {
  border: 1px solid orange;
  margin-left: 100px;
}
p.value {
  margin-left: inherit;
}
In the above example, the paragraph element with class "value" will inherit the margin value from its parent element, which is 100px to the left.
CSS Margin Collapse
Sometimes, two adjacent margins collapse into a single margin. Top and bottom margins of elements can collapse into a single margin that equals the larger of the two margins. This behavior does not occur with left and right margins; it applies specifically to top and bottom margins.
h1 {
  margin: 0 0 40px 0;
}
h2 {
  margin: 10px 0 0 0;
}
In case of the above example, the margin between the two heading elements will be 40px, because it is the larger of the two margins.
CSS Padding
The CSS padding properties generate space around an element's content, inside any defined borders.
CSS provides precise control over padding with properties for setting the padding on each side of an element (top, right, bottom, and left).
.box {
  padding: 20px;
}
Padding - Individual Sides
CSS includes properties that allow specification of padding for individual sides of an element:
padding-top:Sets the padding at the top of an element.padding-right:Sets the padding at the right side of an element.padding-bottom:Sets the padding at the bottom of an element.padding-left:Sets the padding at the left side of an element.
Each of these padding properties accepts values such as:
length:Specifies padding in units like px, pt, cm, etc.%:Specifies padding as a percentage of the width of the containing element.inherit:Specifies that the padding should inherit from the parent element.
Note: Negative values are not permitted for padding in CSS.
.box {
  padding-top: 15px;
  padding-right: 40px;
  padding-bottom: 100px;
  padding-left: 90px;
}
Padding Shorthand Property
Certainly! The padding shorthand property in CSS allows you to set all four padding values (top, right, bottom, left) in a single declaration.
Here's the CSS code using the padding shorthand property with specific values:
.box {
  padding: 15px 40px 100px 90px;
}
This sets different padding values for each side of the element, starting from the top and moving clockwise (right, bottom, left).
If the padding property has three values:
.box {
  padding: 20px 40px 60px;
}
Then:
20pxis thepaddingvalue for the top.40pxis thepaddingvalue for the right and left.60pxis thepaddingvalue for the bottom.
If the padding property has two values:
.box {
  padding: 20px 40px;
}
Then:
20pxis thepaddingvalue for the top and bottom.40pxis thepaddingvalue for the right and left.
If the padding property has one value:
.box {
  padding: 20px;
}
Then:
- 20px is the padding value for all four sides (top, right, bottom, left).
Padding and Element Width
The CSS width property defines the width of an element's content area. The content area is the part inside the padding, border, and margin of an element.
Therefore, if an element has a specified width, any padding added to that element will increase its total width. This can often lead to unintended layout changes.
div.element2 {
  width: 400px;
  padding: 30px;
}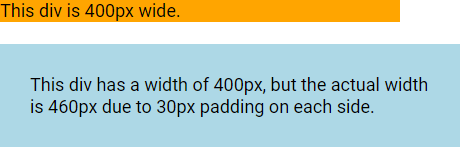
In this example:
- The
.element2class sets the width of the<div>element to 400px. padding: 30pxadds 30px ofpaddingto all sides of the element, increasing the total width to 460px (400px content width + 30px left padding + 30px right padding).
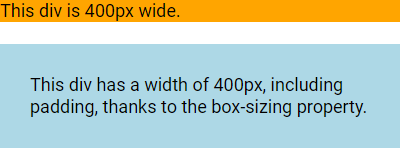
To ensure the width remains 400px regardless of the padding, you can use the box-sizing property. This makes the element maintain its specified width; increasing the padding will reduce the available content space instead of increasing the element's overall width.
div.element2 {
  width: 400px;
  padding: 30px;
  box-sizing: border-box;
}
In this example:
- The element2 class sets the width of the
<div>element to 400px. padding: 30px;adds 30px of padding to all sides of the element.box-sizing: border-box;ensures that the total width of the element remains 400px, including the padding, so the content area adjusts to fit within the specified width.
Please check our next tutorials to learn more about CSS. Please check below options for the links to our previous or next tutorial.