In this tutorial you will learn how to create buttons in HTML using CSS.
First, you need to create a link, button or an input button HTML element as shown below:
<button class="button">Default Button</button>
<a href="/tutorials" class="button">Link Button</a>
<input type="button" class="button" value="Input Button">![]()
Now we will see how to style the above elements as buttons in CSS.
Basic Button Styling
.button {
  background-color: red;
  border: none;
  color: white;
  padding: 10px 25px;
  text-align: center;
  text-decoration: none;
  display: inline-block;
  font-size: 16px;
}
Button Colors
To modify the background color of a button, apply the background-color property:
.button-one {background-color: #f44336;}
.button-two {background-color: #04AA6D;}
.button-three {background-color: #008CBA;} 
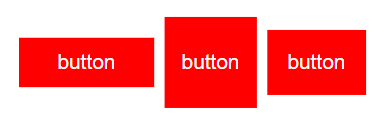
Button Sizes
To adjust the font size of a button, use the font-size property:
.button-one {font-size: 16px;}
.button-two {font-size: 20px;}
.button-three {font-size: 24px;}
Apply the padding property to adjust the spacing inside a button:
.button-one {padding: 10px 30px;}
.button-two {padding: 26px 13px;}
.button-three {padding: 16px;}
Rounded Buttons
To create rounded corners on a button, use the border-radius property:
.button-one {border-radius: 8px;}
.button-two {border-radius: 12px;}
.button-three {border-radius: 50%;}
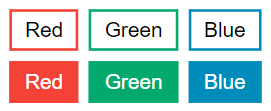
Colored Button Borders
Apply the border property to give a button a colored border:
.button-one {border: 2px solid #f44336;}
.button-two {border: 2px solid #04AA6D;}
.button-three {border: 2px solid #008CBA;}
Hoverable Buttons
Utilize the :hover selector to modify a button's style when the mouse hovers over it.
Note: Adjust the transition-duration property to control the speed of the hover effect.
.button {
  transition-duration: 0.4s;
}
.button-one:hover {
  background-color: #f44336;
  background-color: #ffffff;
}
.button-two:hover {
  background-color: #04AA6D;
  background-color: #ffffff;
}
.button-three:hover {
  background-color: #008CBA;
  background-color: #ffffff;
}
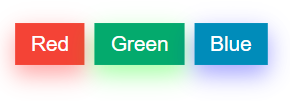
Shadow Buttons
Apply the box-shadow property to create shadows around a button:
.button-one {
  box-shadow: 0 8px 16px 0 rgba(255,0,0,0.2), 0 6px 20px 0 rgba(255,0,0,0.19);
}
.button-two {
  box-shadow: 0 8px 16px 0 rgba(0,255,0,0.2), 0 6px 20px 0 rgba(0,255,0,0.19);
}
.button-three {
  box-shadow: 0 8px 16px 0 rgba(0,0,255,0.2), 0 6px 20px 0 rgba(0,0,255,0.19);
}
Disabled Buttons
Use the opacity property to add transparency to a button.
Note: You can also add the cursor property with a value of not-allowed, which will display a "no parking sign" when you mouse over the button:
.button {
  opacity: 0.6;
  cursor: not-allowed;
}
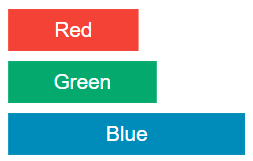
Button Width
By default, a button's width is set based on its text content. To adjust the button's width, use the width property:
.button-one {width: 100px;}
.button-two {width: 25%;}
.button-three {width: 40%;}
Button Groups
This CSS rule removes any margins around the buttons and aligns them side by side using float: left creating a button group effect.
.button {
  float: left;
}
