The position property determines how an element is positioned within its parent container, offering options like:
staticrelativefixedabsolutesticky
The top, bottom, left, and right properties are used to position elements within their containers. However, these properties require the position property to be set first. Their behavior varies based on the chosen position value.
position: static;
By default, HTML elements are positioned statically.
Static positioned elements ignore the top, bottom, left, and right properties.
An element with position: static; is positioned according to the normal document flow, without any special positioning behaviors applied.
.parent {
  position: static;
  background-color: #f0f0f0;
}
.child {
  position: static;
  top: 20px;
  left: 30px;
  background-color: #007bff;
}
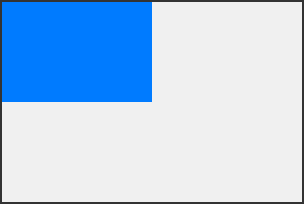
This code demonstrates the use of position: static; for both .parent and .child.
As you can see in the below preview, the static positioned element having the class .child ignore the top: 20px;, and left: 30px; properties.
position: relative;
When an element is given position: relative;, it remains within its default position in the document flow.
Adjusting the top, right, bottom, or left properties of a relatively-positioned element shifts it away from its initial position. This adjustment does not affect the surrounding content and it does not fill in any space left by the moved element.
.parent {
  position: relative;
  background-color: #f0f0f0;
}
.child {
  position: relative;
  top: 20px;
  left: 50px;
  background-color: #007bff;
}
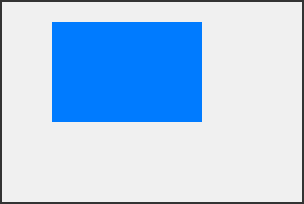
This code demonstrates how position: relative; allows you to position an element. As you can see in the below preview, the relative positioned element having the class .child with the top and left properties shifts away by 20px and 50px respectively, from its initial position (see the previous example for initial position) .
position: fixed;
An element with position: fixed; is anchored to the viewport, ensuring it remains in a fixed position regardless of page scrolling. This positioning is controlled using the top, right, bottom, and left properties.
When an element is fixed, it does not disrupt the page layout by leaving an empty space where it would have originally been positioned.
.parent {
  position: relative;
  background-color: #f0f0f0;
}
.child {
  position: fixed;
  top: 20px;
  left: 50px;
  background-color: #007bff;
}
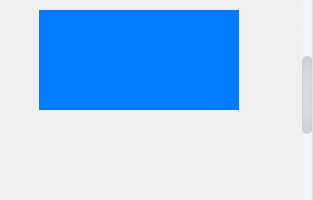
In the above example, the element with class .child will remain in the same position (top: 20px; left: 50px;) relative to the viewport, regardless of scrolling, as you can see in the below preview. This is useful for elements like navigation menus or headers that you want to remain visible as users scroll through content.
position: absolute;
An element with position: absolute; is positioned relative to its nearest ancestor that has a position value other than static. If no such ancestor exists, it is positioned relative to the document body and moves with page scrolling.
Absolute positioned elements are taken out of the normal document flow, allowing them to overlap other elements on the page.
.parent {
  position: relative;
  background-color: #f0f0f0;
}
.child {
  position: absolute;
  top: 0;
  right: 0;
  background-color: #007bff;
}
In the above example, the element having the class .child is absolutely positioned, relative to its nearest ancestor having position: relative;, that is the element having the class .parent, as you can see in the below preview.
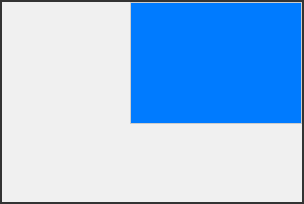
If we remove position: relative; from the .parent element, the .child element will be positioned relative to the document body, if no other ancestor having position: relative; exists in the web page.
position: sticky;
An element with position: sticky; is initially positioned relative to its nearest scrolling ancestor or the viewport itself. Once the element reaches a specified offset position relative to the viewport, it "sticks" in place like position: fixed;. This behavior toggles between relative and fixed depending on the user's scroll position. As you can see below.
.parent {
  position: relative;
  background-color: #f0f0f0;
}
.child {
  position: sticky;
  top: 20px;
  background-color: #007bff;
}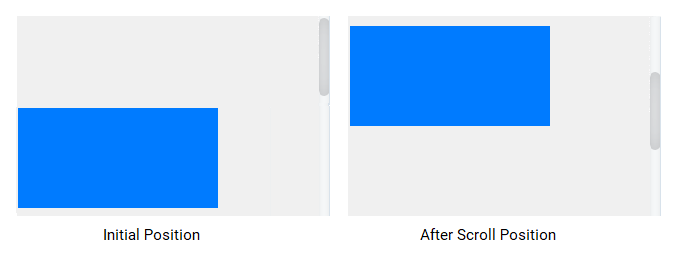
Sticky positioning allows elements to remain in view while scrolling through content, providing a useful way to create headers, navigation bars, or other persistent elements on a webpage.
Positioning Text In an Image
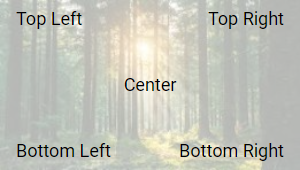
Here is an example for positioning text in an image.
HTML
<div class="parent">
  <img src="image.png">
  <div class="top-left">Top Left</div>
  <div class="top-right">Top Right</div>
  <div class="center">Center</div>
  <div class="bottom-left">Bottom Left</div>
  <div class="bottom-right">Bottom Right</div>
</div>
CSS
.parent {
  position: relative;
}
img {
  width: 100%;
  height: auto;
  opacity: 0.3;
  display: block;
}
.top-left {
  position: absolute;
  top: 8px;
  left: 16px;
}
.top-right {
  position: absolute;
  top: 8px;
  right: 16px;
}
.center {
  position: absolute;
  top: 50%;
  left: 50%;
}
.bottom-right {
  position: absolute;
  bottom: 8px;
  right: 16px;
}
.bottom-left {
  position: absolute;
  bottom: 8px;
  left: 16px;
}
Explanation
- First of all, set the
positionof the.parentelement torelative, so that the other elements are contained inside it. - Then, set the
displayproperty of theimgelement toblock, so that any white space around it is removed. - Then, use the required
position,top,right,bottomandleftproperties to position the text in the desired locations as shown in the above code.
The preview of the above example will look like this:
CSS Positioning Properties
bottom:Determines the distance between the bottom edge of a positioned box and its nearest positioned ancestor.clip:Restricts the visible area of an absolutely positioned element to its bounding box.left:Specifies the offset from the left edge of a positioned box.position:Defines the method used to position an element, such as static, relative, absolute, fixed, or sticky.right:Establishes the distance between the right edge of a positioned box and its nearest positioned ancestor.top:Sets the offset from the top edge of a positioned box, relative to its nearest positioned ancestor.
Please check below options for the links to our previous or next tutorial.
